
Painting the lines on a pickleball court is an essential process to ensure accurate gameplay and maintain the court’s professional appearance. Whether you are a homeowner looking to create a personal pickleball court or a community organization responsible for maintaining a public court.
This guide will provide you with step-by-step instructions on how to paint lines on a pickleball court. By following these guidelines, you can transform any surface into a vibrant and functional area for pickleball enthusiasts to enjoy.
Materials Needed
Before starting the line painting process, gather the following materials:
- Measuring Tape
- Large Chalk Line Reel
- Pickleball Court Stencil Kit
- Paint Sprayer or Roller
- Pickleball Court Line Paint
- Masking Tape
- Paint Tray
- Paint Brushes
- Drop Cloths or Tarps
- Painter’s Tape
- Water and Soap for Cleanup
Preparation
Before diving into the actual painting, it is important to properly prepare the court to ensure clean and accurate lines. Here are the steps:
1. Clean the Court
Thoroughly clean the court surface by removing any debris, loose dirt, or grass. Sweep the court or use a leaf blower to get rid of small particles. This will provide an ideal surface for the paint to adhere to and ensure a more professional finish.
2. Measure and Mark
Using a measuring tape, measure the dimensions of the pickleball court to ensure it meets the official measurements. Once you have the measurements, mark the court corners with small stakes or flags.
3. Secure the Stencil Kit
Position the pickleball court stencil kit on the court surface, ensuring it aligns perfectly with the markings you made for the court corners. Use masking tape or any adhesive suitable for the court surface to secure the stencil in place.
4. Protect the Surrounding Area
To prevent unwanted paint splatters on adjacent surfaces, use drop cloths or tarps to cover any surrounding areas, such as fences, walls, or other playing surfaces. This will make the cleanup process much easier at the end.
How to Paint Lines on a Pickleball Court?
If you want to know How to Paint Lines on a Pickleball Court? Then follow below given steps:
1. Prepare the Paint
Read the instructions provided with the pickleball court line paint and follow them for proper mixing, if required. Ensure the paint is of good quality and suitable for outdoor use. Pour the paint into a paint tray, ensuring there is enough for the entire line painting process.
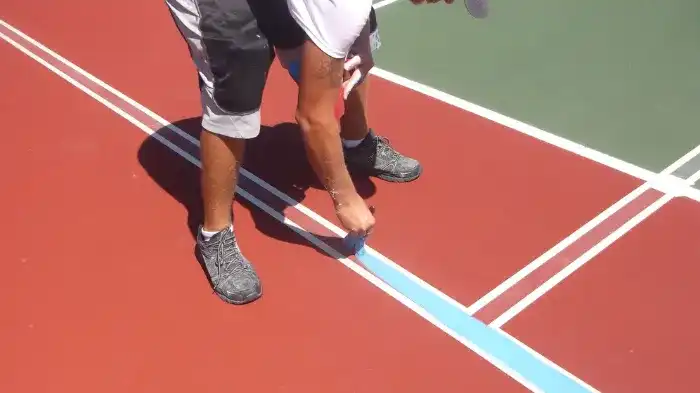
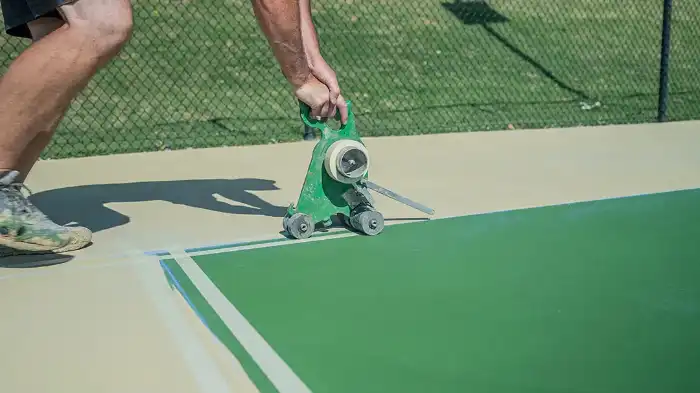
2. Apply the Paint
Using a paint sprayer or roller, carefully apply an even coat of paint within the stencil kit. Start from one end and work your way to the other. Be cautious not to apply excessive paint, as it may lead to blurring or bleeding of the lines.
3. Remove the Stencil Kit
After covering all areas within the stencil with paint, gently remove the stencil kit. Ensure the paint is still wet. If any paint has seeped under the stencil, use a small paintbrush to touch up those areas while the paint is still wet.
4. Allow to Dry
Allow the painted lines to dry fully before applying any additional coats or allowing players on the court. Refer to the paint manufacturer’s instructions for the recommended drying time. Avoid any contact with the fresh paint until it is completely dry.
Cleanup and Maintenance
1. Cleanup
Clean any paint spills or splatters immediately using water and soap. Remove any masking tape or drop cloths. Put away all your painting equipment and dispose of any paint containers responsibly, following local regulations.
2. Maintenance
Regular maintenance is vital to keep the court lines in optimal condition. Inspect the lines periodically for wear or fading and touch them up as necessary. Clean the court regularly, removing debris and dirt that may make the lines less visible or affect the gameplay.
Conclusion
Painting lines on a pickleball court is an essential task for creating a professional and enjoyable gaming experience. By following these step-by-step instructions, you can achieve accurate and vibrant lines, providing a visually appealing court for players.
Remember, proper preparation, using quality materials, and regular maintenance are key factors in maintaining the durability and quality of the lines. So, go ahead and transform that empty space into a fantastic pickleball court for players to have a great time!
Frequently Asked Questions
A1: To paint lines on a pickleball court, you need to measure and mark the court dimensions, apply masking tape along the lines, and paint the lines with acrylic paint. You can also seal the surface to protect the paint and the pavement.
A2: To paint lines, you will need a measuring tape, chalk or string for layout markings, a roller or brush for application, a paint tray, painter’s tape for sharp edges, and a sturdy pole or broomstick for stirring the paint.
A3: According to official regulations, the pickleball court lines should be 2 inches wide. The dimensions of the court should be 20 feet wide and 44 feet long for doubles play, while a singles court is 20 feet wide and 22 feet long.
A4: To ensure straight and accurate lines, it is recommended to use a measuring tape and layout the markings with chalk or string before painting. Additionally, the use of painter’s tape along the edges can help achieve sharp and crisp lines.
A5: The drying time for the paint can vary depending on the type and weather conditions, but generally, it is advisable to allow the paint to dry for at least 24 to 48 hours. It is important to avoid foot traffic or any other contact with the painted lines during this drying period to ensure a smooth and durable finish.